So you’re trying to set up for PBLemulator. Before you run anything, let’s slow down — the most important step here isn’t technical. It’s figuring out whether what you’re about to install is even real, and it’s a step I nearly skipped myself.
Why This Guide Looks Different
I went looking for a way to set up for PBLemulator and kept hitting the same handful of installation commands, copy-pasted across half a dozen blogs and forums. None linked back to an actual project page — no GitHub, no changelog, nothing. That’s what made me stop instead of running the commands and hoping for the best.

Basic Prerequisites for Emulation
Before touching an installation command, or trying to Set Up For PBLemulator at all, check if your system meets the baseline for emulation software generally:
- RAM: 8GB is a comfortable baseline for many modern emulation setups; 16GB DDR5 RAM can provide more breathing room for demanding workloads.
- CPU architecture: x86_64 covers most desktops and laptops. ARM machines need ARM builds specifically, and not every emulator has one.
- Graphics: a GPU with Vulkan or at least OpenGL 4.x.
- C++ Redistributables (Windows): install the latest Microsoft Visual C++ Redistributable first.
- Disk space: a few extra GB beyond the emulator itself, for BIOS files, save states, shader caches.
This baseline holds whether you end up on a verified alternative or a confirmed PBLemulator release someday.
Verify Your Source
PBLemulator gets mentioned a lot online, usually alongside PlugboxLinux — forum posts, blog comments, how-to articles. I went looking for a clearly verified official website, GitHub repository, or package source. Didn’t find one, at least not as of this writing.
That caught my attention. If a project’s genuinely active, there’s usually one obvious place to follow it — a GitHub org with real commit history, a project site, a package listed under someone identifiable. None of that turned up here, and for something people are actively telling others to install, that’s a signal worth paying attention to.

If you’re working from a guide found elsewhere, check first:
- Search the exact package name and repo URL alone, without “PBLemulator” in the query.
- Look for commitment history, an identifiable maintainer, or people discussing the project outside install guides.
- Be wary of any PPA, APK, or `.exe` that only shows up inside copy-pasted instructions and nowhere else.
One site worth naming: pblemulator.com. It reads like content-farm material — pages titled “tips pblemulator” and “release date pblemulator” padding generic filler around the keyword, telling readers to “go to the official pblemulator site” without ever naming or linking one. One page describes PBLemulator as a rumored code name with no company site or roadmap, while another page on the same domain gives confidential installation steps as if it’s a shipped product. Thin content, keyword stuffing, self-contradiction.
If none of these checks out, stop and move to the next section.
A Note on Platform-Specific Risk
Linux: `sudo add-apt-repository ppa:pbl-official/stable` hands a third-party repo root-level trust before you’ve confirmed it’s real. Best case, the installation fails; worst case, your package manager points at something you don’t control.
Windows: unverified `.exe` installers carry the usual risk of any unsigned executable — no publisher check, no tamper guarantee.
Android: APKs from outside the Play Store skip Google’s review entirely — same unverified-source problem, different platform.
Choose a Verified Alternative (Recommended)
Until PBLemulator has real documentation, established emulators with transparent, auditable development are the safer route — RetroArch, Dolphin, PCSX2, DuckStation, depending on the platform. Real repositories, findable maintainers, communities that have scrutinized the code for years.
How the Alternatives Compare
| Emulator | Best For | Source Verified? | Notes |
| RetroArch | Multi-system setup | Yes — active GitHub | Learning curve at first, very stable once configured |
| Dolphin | GameCube / Wii | Yes — active GitHub | Runs great on modern hardware |
| PCSX2 | PlayStation 2 | Yes — active GitHub | Config matters more than expected |
| DuckStation | Original PlayStation | Yes — active GitHub | Lightweight, good for lower-spec machines |
| PBLemulator | Unclear | No — no verified source | Can’t recommend an install path yet |
If emulation is the real goal and PBLemulator specifically isn’t, this table is more useful than the rest of the guide.
Here’s the official RetroArch install path on Ubuntu/Debian, from Libretro’s documentation— exactly the kind of verified, traceable source Step 1 is about:
sudo add-apt-repository ppa:libretro/stable

sudo apt update

sudo apt install retroarch
Maintained by the Libretro team, linked directly from RetroArch’s site — the opposite of the unverified commands in Step 4.
Prepare Your System
- Update GPU drivers straight from NVIDIA, AMD, or Intel — skip the generic system updater.
- Enable hardware virtualization in BIOS/UEFI if needed — Intel VT-x or AMD-V.
- Close background programs to free CPU and RAM before installing anything demanding.
- Allocate resources with intention — a portion of your CPU core, not all of them, and don’t max out RAM. Treat this as a starting point, not a fixed rule.
Install (Verified Packages Only)
Install through the official repository or package manager for whatever you’ve picked — this is where verification pays off. Official repositories are signed and monitored; random PPAs and third-party APKs aren’t.
If you’re still set on Set Up For PBLemulator specifically, confirm the PPA or package source from Step 1 yourself first. Commands like adding an unverified PPA and running `apt install pblemulator-plugin` are floating around — where they lead is anyone’s guess. Running that blind, with root privileges, is exactly the kind of move that’s gone wrong for people: a broken system if you’re lucky, a compromised one if you’re not.
If You’re Going to Test It Anyway
Steer clear of your main machine. If you’re determined despite everything above:
- Run it in a VM (VirtualBox or VMware) or Windows Sandbox.
- Scan the installer’s hash on VirusTotal
- Don’t log into personal accounts inside that isolated environment.
- None of this guarantees safety — it limits the blast radius.
Configure
- Keep BIOS files in their own labeled folder, and only use ones you’re legally entitled to — copyright rules on ROMs and BIOS dumps depend on where you live.
- Set Vulkan as the renderer where supported — performs well on modern GPUs; results vary. Fall back to OpenGL or DirectX for compatibility issues.
- Turn on asynchronous shader compilation if offered — one of the biggest fixes for stutter. Without it, the emulator freezes the frame while compiling a new shader; with it, a placeholder renders while the real shader compiles in the background.
- Enable shader caching so compiled shaders persist between sessions.
- Check V-Sync / frame pacing — V-Sync cuts tearing but can add lag; try fast sync or a frame limiter if that trade-off bothers you.
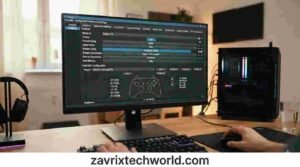
- Map controllers carefully, and go wired if input lag matters.
- Start with something lightweight before loading anything demanding.
Troubleshoot
| Problem | Likely Cause | Fix |
| Install fails | Fake or unverified repository | Stop, re-verify the source |
| Black screen / crash | Missing BIOS or wrong renderer | Add correct BIOS, try a different API |
| Stuttering | Over-allocated cores, weak GPU assignment | Reduce cores, force dedicated GPU, enable async shaders |
| Input lag | Wireless controller or V-Sync | Switch to wired, try fast sync |
| Audio crackling | Buffer too low or CPU bottleneck | Increase buffer, check CPU allocation |
If something’s not on this list, skip the random “fix” command and re-check the source — same problem as Step 1, later in the process.
Final Thought
Anyone trying to set up for PBLemulator right now is working with an unverified tool chain. Better to say that plainly than write around it. This guide prioritizes a genuinely safe process over commands nobody can stand behind. If verified sources show up, Step 4 gets updated.
Frequently Asked Questions
Is PBLemulator safe to install?
Can’t say either way — no official source to verify. Not confirmed danger, just an inability to confirm safety. Treat any command as unverified until traced yourself.
Is PBLemulator even real?
Mentioned constantly, especially with PlugboxLinux, but no official site, repository, or listing behind it. Could be real but obscure, a rebranding, or just widely circulating inaccurate content.
Why not just give the installation commands?
None of the ones circulating trace to a confirmed repository. Running unverified commands that add a repo and install a package carries real risk.
What should I use instead?
RetroArch, Dolphin, PCSX2, or DuckStation, depending on the platform — see the comparison table.
What if I want to try PBLemulator anyway?
Isolate it in a VM or sandbox, scan the installer’s hash for VirusTotal first. Details in Step 4.
Is downloading ROMs or BIOS files illegal?
Depends on your country and circumstances; some places allow backups of games you own. Check your own jurisdiction.
Will this guide be updated if PBLemulator gets an official release?
Yes — a verified source appearing triggers an update to Step 4.
